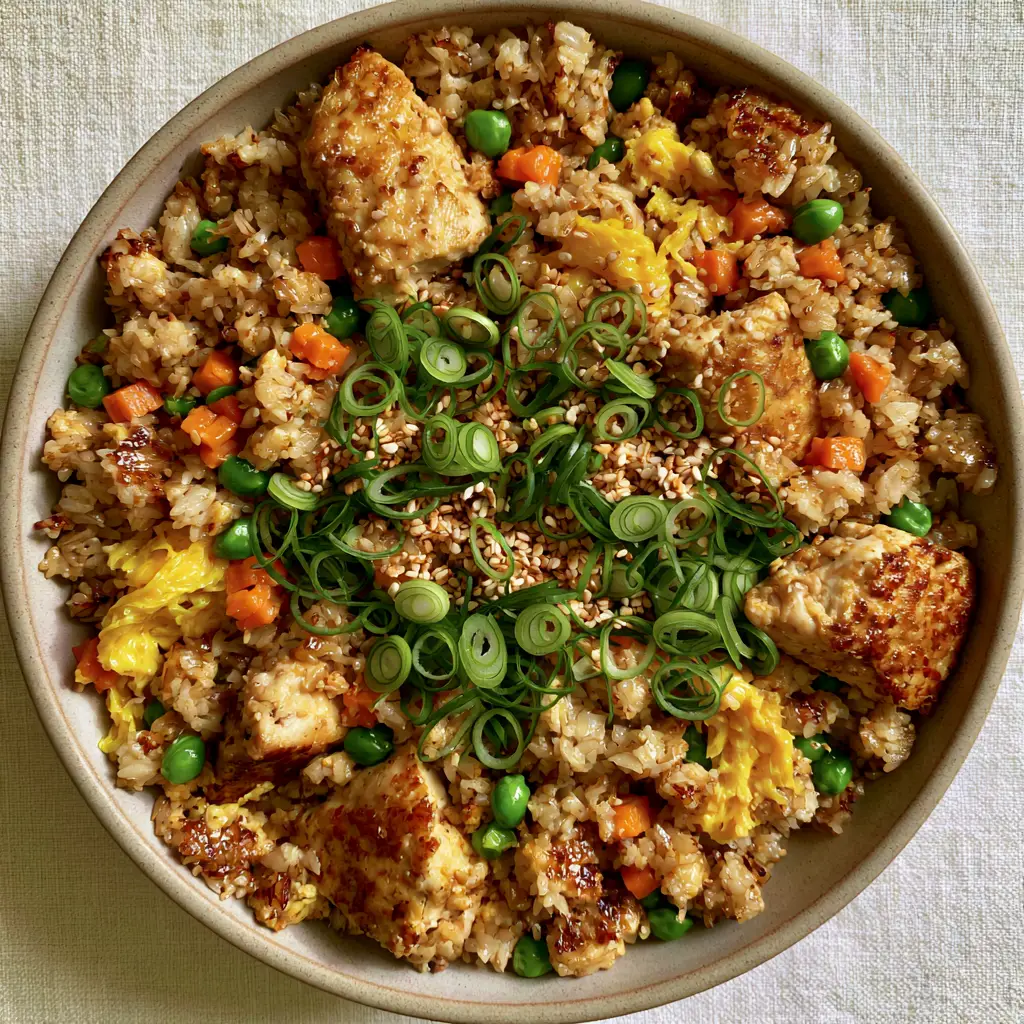
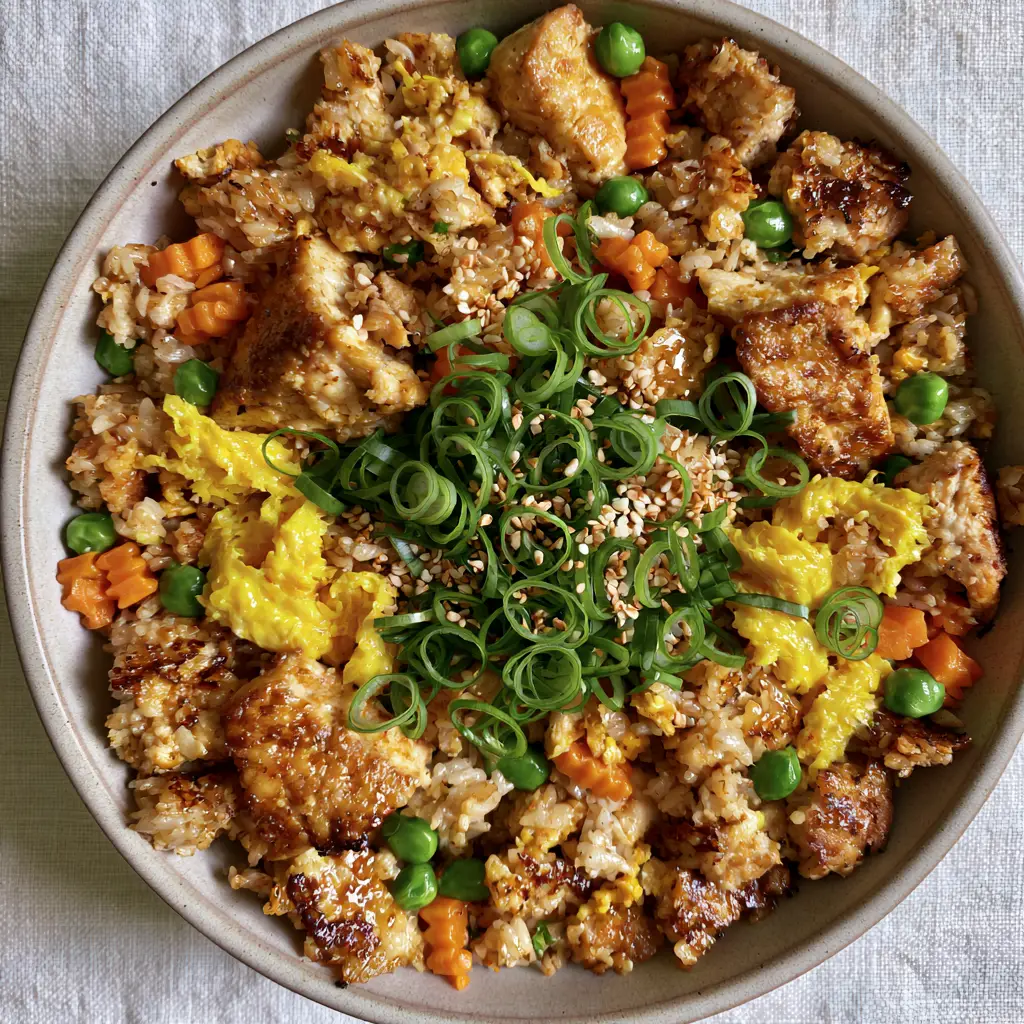
Mastering the art of the perfect chicken fried rice is a rite of passage for every home cook. Imagine a shallow matte ceramic bowl filled with individual, distinct grains of jasmine rice, each boasting seared edges and a light, glossy umami glaze. This isn’t just a side dish; it’s a textural masterpiece where juicy chunks of golden-seared chicken breast meet the crunch of carrot brunoise and the pop of sweet green peas.
Every spoonful of this chicken fried rice offers a contrast between soft, fluffy ribbons of bright yellow scrambled egg and the aromatic “forest” of freshly sliced green scallions. Whether you are looking for a quick weeknight dinner or a professional-grade meal prep option, this recipe delivers restaurant-quality results using simple, high-impact techniques. Let’s dive into the science of the wok and the secrets of the perfect sear.
The Secrets to Achieving Restaurant-Quality Texture
- The Individual Grain Rule: We use chilled, day-old jasmine rice to ensure every grain stays separate and develops those coveted toasted brown edges without turning into a mushy clump.
- Maillard-Style Searing: By using high heat and a heavy-bottomed skillet, we achieve a deep golden-brown crust on the chicken breast cubes while keeping the interior succulent and tender.
- Ribboned Egg Technique: Instead of scrambling the eggs into tiny bits, we create wide, fluffy yellow ribbons that stand out visually and provide a soft, pillowy mouthfeel against the toasted rice.
- The Glossy Umami Glaze: A precision blend of light soy sauce and toasted sesame oil provides a thin, non-greasy coating that makes every grain shine under natural daylight.
Essential Components for the Ultimate Stir-Fry
To create a chicken fried rice that looks exactly like a high-end food photograph, we need to be meticulous with our prep. Here is everything you need to gather before the first flame is lit.
The Foundational Proteins and Grains
Long-Grain Jasmine Rice: Use 4 cups (600g) of cooked, chilled jasmine rice. Cold rice is drier, which allows the exterior to fry and crisp rather than steam in its own moisture.
Boneless Skinless Chicken Breast: 1 lb (450g) of chicken, cut into uniform 1-inch (2.5cm) cubes. Uniformity ensures that every piece sears at the same rate, preventing dry or rubbery meat.
Large Farm-Fresh Eggs: 3 large eggs, lightly beaten with a pinch of salt. These provide the bright yellow ribbons that weave through the darker seared rice grains.
The Garden Elements for Color and Crunch
Diced Carrot Brunoise: 1/2 cup (75g) of finely diced orange carrots. These add a natural sweetness and a vibrant orange pop that complements the golden chicken.
Plump Sweet Green Peas: 1/2 cup (70g) of frozen or fresh peas. These should be added near the end of the process to maintain their bright green color and “pop” texture.
The Scallion Forest: 4 large stalks of green scallions, sliced into thin rounds. We use both the white parts for flavor and a generous amount of the green tops for a fresh garnish.
The Umami Glaze and Finishing Touches
Light Soy Sauce: 2 tbsp (30ml) of high-quality light soy sauce. This provides the salt and deep savory base without making the rice look overly dark or muddy.
Toasted Sesame Oil: 1 tsp (5ml) of oil for that signature nutty aroma that defines authentic fried rice.
Toasted White Sesame Seeds: 1 tbsp (9g) for a delicate dusting. These add a micro-crunch and a professional finish to the final presentation.
High-Smoke Point Oil: 3 tbsp (45ml) of avocado or vegetable oil. You need an oil that can handle the intense heat required to sear the rice grains individually.
Tools Required for Wok-Style Success
To achieve the specific visual of individual rice grains with seared edges, your equipment matters. A large, heavy-bottomed stainless steel skillet or a traditional carbon steel wok is essential for heat retention. You will also need a wide metal spatula—often called a “wok turner”—which allows you to flip large sections of rice without breaking the grains. Finally, a sharp chef’s knife is non-negotiable for achieving that perfect, tiny carrot brunoise.
Mastering the Sear: Step-by-Step Instructions
Phase 1: Searing the Golden Chicken Cubes
Pat your chicken cubes completely dry with paper towels to remove surface moisture. Heat 1 tbsp (15ml) of oil in your pan over medium-high heat until you see a faint wisp of smoke. Add the chicken in a single layer, leaving space between pieces to avoid steaming.
Let the chicken sit undisturbed for 2-3 minutes. You are looking for a deep, golden-brown crust to form—this is the Maillard reaction in action. Flip and cook for another 2 minutes until just cooked through, then remove the chicken and set it aside to rest.
Phase 2: Creating the Fluffy Yellow Egg Ribbons
Wipe the pan clean and add another 1/2 tbsp (7ml) of oil. Pour in the beaten eggs and tilt the pan so they form a thin, wide sheet. Once the bottom is set but the top is still slightly moist, use your spatula to gently fold the egg into wide ribbons. Remove immediately; they will finish cooking off the heat, remaining bright yellow and soft.
Phase 3: The High-Heat Rice Transformation
Turn the heat to high and add the remaining 1.5 tbsp (22ml) of oil. Add the chilled jasmine rice, breaking up any large clumps with your hands as you drop it in. Spread the rice across the surface of the pan and let it sit for 60 seconds without moving it.
Listen for the crackle and pop—this is the sound of the moisture escaping and the rice searing. Toss the rice and repeat until you see visible golden-brown seared edges on at least 30% of the grains. Add the carrot brunoise and peas, tossing for 2 minutes until the carrots are tender-crisp.
Phase 4: The Glaze and Final Assembly
Return the chicken and egg ribbons to the pan. Drizzle the light soy sauce and toasted sesame oil around the edges of the pan so it sizzles before hitting the rice; this “caramelizes” the sauce instantly. Toss everything together for 60 seconds to create that light, glossy umami glaze. The rice should look moist and shiny but not wet or oily.
Pro-Tips for Flawless Fried Rice
- The “Rice Hand” Rule: When adding your chilled rice, use your fingers to crumble it into the pan. This prevents large cold blocks of rice from lowering the pan temperature too quickly.
- Don’t Overcrowd: If you are doubling the recipe, cook the rice in two batches. Overcrowding the pan leads to “steamed” rice rather than “fried” rice, losing those distinct grains.
- Season in Layers: While soy sauce adds salt, a small pinch of fine sea salt added directly to the chicken and the eggs ensures every component is seasoned to its core.
- Garnish for Height: When plating, don’t just sprinkle the scallions; mound them in the center to create a “forest” effect that adds visual depth to your handheld smartphone photos.
Storage, Reheating, and Meal Prep
This chicken fried rice is actually better the next day as the flavors have time to meld. Store leftovers in an airtight container in the refrigerator for up to 4 days. When reheating, avoid the microwave if possible. Instead, toss the rice back into a hot skillet with a teaspoon of water; the steam will revive the rice’s texture without making it rubbery.
For long-term storage, you can freeze this dish for up to 2 months. To reheat from frozen, let it thaw in the fridge overnight before following the skillet reheating method mentioned above.
What to Serve with Your Fried Rice
While this dish is a complete meal on its own, it pairs beautifully with other Asian-inspired textures. For a seafood twist, consider serving a side of sesame ginger tuna steak or even a light shrimp fried rice for a “surf and turf” buffet. If you want to keep the meal tropical, a coconut rice side dish can provide a sweet contrast to the salty umami glaze of the chicken.
For dessert, stay within the flavor profile by trying a mango crepe cake or refreshing mango bingsu to cleanse the palate after the savory richness of the fried rice.
Frequently Asked Questions
Yes! Use a large, heavy-bottomed stainless steel or cast-iron skillet. The key is surface area and heat retention to fry the rice instead of crowding it.
Use at least 4 stalks of scallions and slice them very thin. Use both the white and green parts, and pile them high in the center of the bowl just before serving.
Sear the chicken over high heat quickly to develop a crust (Maillard reaction) and remove it from the pan as soon as it’s cooked. Only return it at the very end to warm through.
Light soy sauce is thinner and saltier but has a lighter color, which keeps the rice looking golden-brown rather than dark and muddy. It is preferred for visual appeal.
Fresh rice contains too much moisture, which causes it to steam and clump. Chilled, day-old rice is drier, allowing individual grains to sear and develop a toasted texture.
The Ultimate Chicken Fried Rice Recipe Card
Chicken Fried Rice with Seared Jasmine Grains and Golden Chicken
Ingredients
Equipment
Method
- Heat 1 tbsp oil in a wok. Add chicken cubes in a single layer. Sear until golden-brown crust forms (approx 3 mins), flip and cook through. Remove and set aside.
- Add a splash of oil to the pan. Pour in beaten eggs. Once set, fold into wide yellow ribbons. Remove and set aside.
- Heat remaining oil on high. Add cold rice, breaking clumps. Let sit for 60 seconds to develop toasted edges. Toss and repeat.
- Add carrots and peas. Stir-fry for 2 minutes until carrots are tender but crisp.
- Return chicken and eggs to the pan. Drizzle with soy sauce and sesame oil. Toss for 60 seconds until glossy. Garnish with scallions and sesame seeds.
Notes
Always sear chicken in batches to ensure a golden crust.
Bring the Bistro Home
This chicken fried rice proves that with the right technique, simple ingredients can become a gourmet experience. The contrast of the seared jasmine rice grains against the tender chicken and fluffy eggs creates a bowl that is as beautiful to look at as it is to eat. Don’t forget to snap a photo of your “scallion forest” and tag us!
If you loved this recipe, please leave a comment below and share your results on Pinterest. For more kitchen inspiration, sign up for our newsletter to get weekly recipes delivered straight to your inbox!