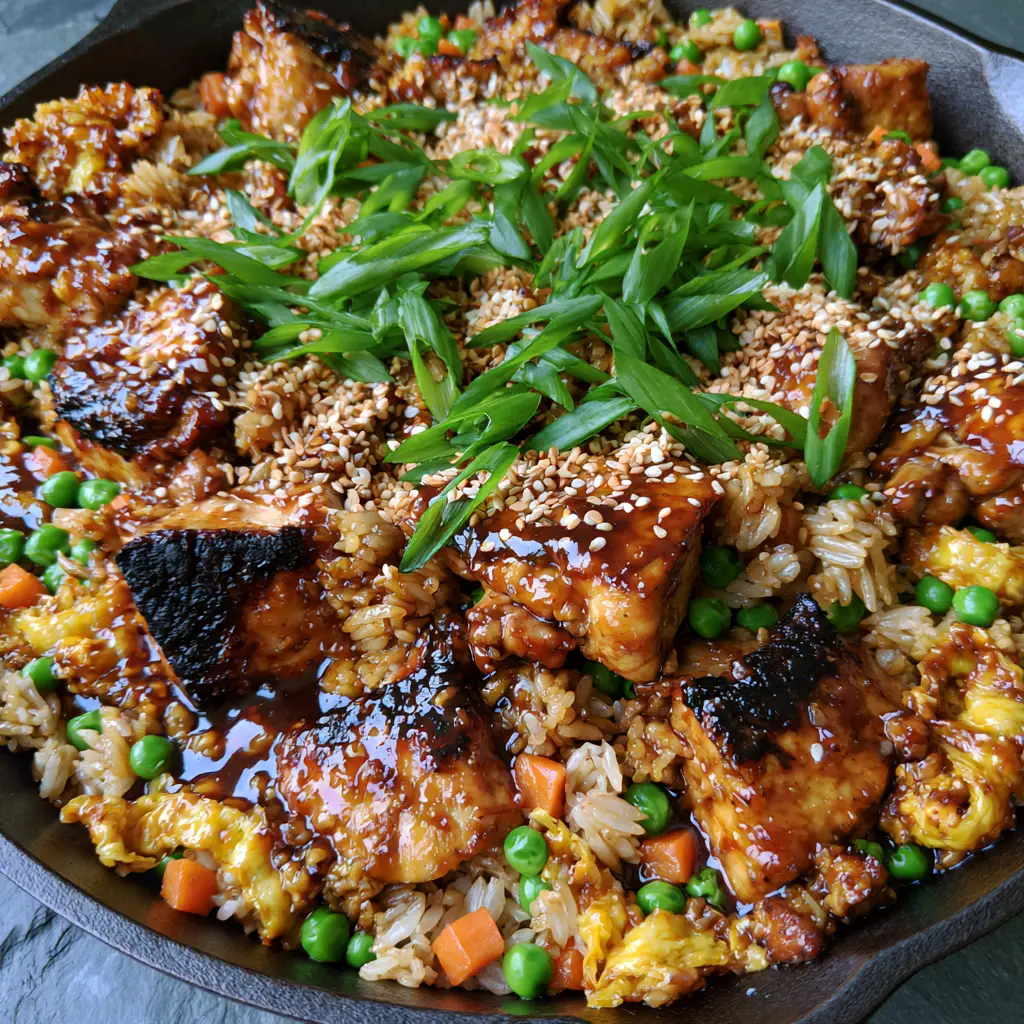
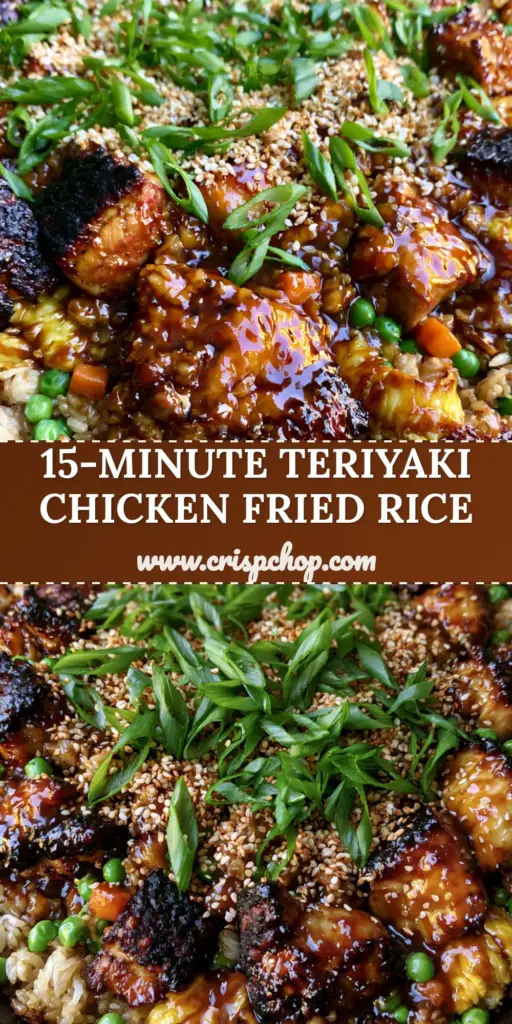
There is a specific culinary magic that happens when a screaming-hot cast iron skillet meets succulent chicken thighs and chilled jasmine rice. This Teriyaki Chicken Fried Rice isn’t just a quick weeknight meal; it is a masterclass in texture, featuring deep dark brown seared edges on juicy chicken cubes coated in a thick, glossy, amber-toned glaze that catches the light beautifully. If you have been searching for that perfect restaurant-style finish where every grain of rice remains distinct and fluffy, you have arrived at the right place.
The secret lies in the forensic details of the preparation—the way the golden scrambled egg ribbons weave through the vibrant green sweet peas and tiny cubes of bright orange carrots. By the time you finish this guide, you will understand how to achieve that professional “wok hei” breath of the wok in your own kitchen. Whether you are a fan of classic fried rice or looking for a more intense flavor profile, this recipe delivers on every sensory promise.
Every bite offers a symphony of salty, sweet, and umami notes, punctuated by the crunch of fresh scallions and the nutty aroma of toasted white sesame seeds. This Teriyaki Chicken Fried Rice is designed to be a visual and literal feast, mirroring the high-contrast, smartphone-ready aesthetic of a professional kitchen. Let’s dive into the science of the sear and the architecture of the perfect stir-fry.
Why You’ll Crave This Skillet Masterpiece
- The Perfect Sear: Using chicken thighs ensures the meat remains juicy even after achieving those signature dark caramelized teriyaki edges.
- Textural Contrast: We focus on “fluffy, not mushy” jasmine rice, ensuring each grain is coated in oil and sauce without clumping.
- Vibrant Visuals: The combination of bright orange carrots, neon-green peas, and golden egg ribbons creates a plate that looks as good as it tastes.
- Glossy Amber Glaze: Our homemade teriyaki reduction provides a thick, shimmering coating that mimics the best Japanese teppanyaki houses.
- One-Skillet Ease: Designed for a cast iron skillet to maximize heat retention and flavor development.
Essential Components for the Ultimate Glossy Glaze
To achieve the visual and flavor profile of high-end Teriyaki Chicken Fried Rice, we must look beyond the bottle. High-quality ingredients are the foundation of this dish’s deep amber hue and complex profile.
Chicken Thighs (680g / 1.5 lbs): We use boneless, skinless thighs diced into 1-inch cubes. Thighs have a higher fat content than breasts, which is essential for surviving the high heat of the skillet while developing a dark, caramelized exterior.
Cold Jasmine Rice (700g / 4 cups): This is non-negotiable for fluffiness. Day-old rice has lost enough moisture to allow the grains to fry in the oil rather than steam, preventing a mushy texture.
Homemade Teriyaki Base: A blend of 1/2 cup (120ml) soy sauce, 1/4 cup (60ml) mirin, and 3 tbsp (45g) brown sugar. This mixture reduces into the thick, glossy, amber-toned glaze seen in our visual blueprint.
The Aromatics: 2 tbsp (30g) of finely minced ginger and 4 cloves of minced garlic. These “invisible” ingredients provide the foundational scent and depth of flavor that defines great fried rice.
Vegetable Medley: 1 cup (150g) of frozen sweet peas and 1/2 cup (75g) of finely diced carrots. These provide the “tiny cubes” of orange and “vibrant green” pops of color required for the final aesthetic.
Egg Ribbons: 3 large eggs, lightly beaten with a pinch of salt. We cook these first to create delicate golden ribbons that are folded back into the rice at the end.
Finishing Garnishes: 1/4 cup (25g) of thinly sliced fresh scallions and 1 tbsp (9g) of toasted white sesame seeds. These add the final layer of texture and a “fresh” visual contrast to the dark seared chicken.
The Culinary Toolkit: Why Cast Iron Matters
While a wok is traditional, a well-seasoned cast iron skillet is the secret weapon for home cooks making Teriyaki Chicken Fried Rice. The massive thermal mass of cast iron prevents the pan temperature from dropping when you add the cold rice.
This heat retention is what allows the chicken to develop those deep dark brown seared edges instead of just boiling in its own juices. You will also need a wide, flat spatula (preferably metal) to aggressively flip and toss the ingredients, ensuring the “individual, fluffy grains” mentioned in our prompt are achieved.
Mastering the Sear: Step-by-Step Instructions
Prepping the Teriyaki Chicken Foundation
Start by patting your chicken thigh cubes bone-dry with paper towels. This is a crucial “forensic” step; moisture is the enemy of a good sear. Season the chicken with a pinch of salt and pepper, but avoid adding the sauce yet.
Heat 2 tbsp (30ml) of high-smoke-point oil (like grapeseed or canola) in your cast iron skillet over medium-high heat until it shimmers. Add the chicken in a single layer, leaving space between cubes. Let them sit undisturbed for 3-4 minutes until a deep golden-brown crust forms on the bottom.
Once seared, pour in half of your teriyaki mixture. The sugar will immediately begin to bubble and reduce, coating the chicken in that thick, glossy, amber-toned glaze. Remove the chicken and any excess glaze from the pan and set aside.
Achieving the Perfect Jasmine Rice Texture
Wipe the skillet quickly and add another tablespoon of oil. Pour in your beaten eggs, swirling the pan to create a thin sheet. Once set, roll the egg up and slice it into thin “ribbons.” Remove and set aside.
Add the remaining oil to the skillet and toss in your diced carrots. Cook for 2 minutes until they soften slightly, then add the garlic and ginger. As soon as the aromatics become fragrant (about 30 seconds), add the cold jasmine rice.
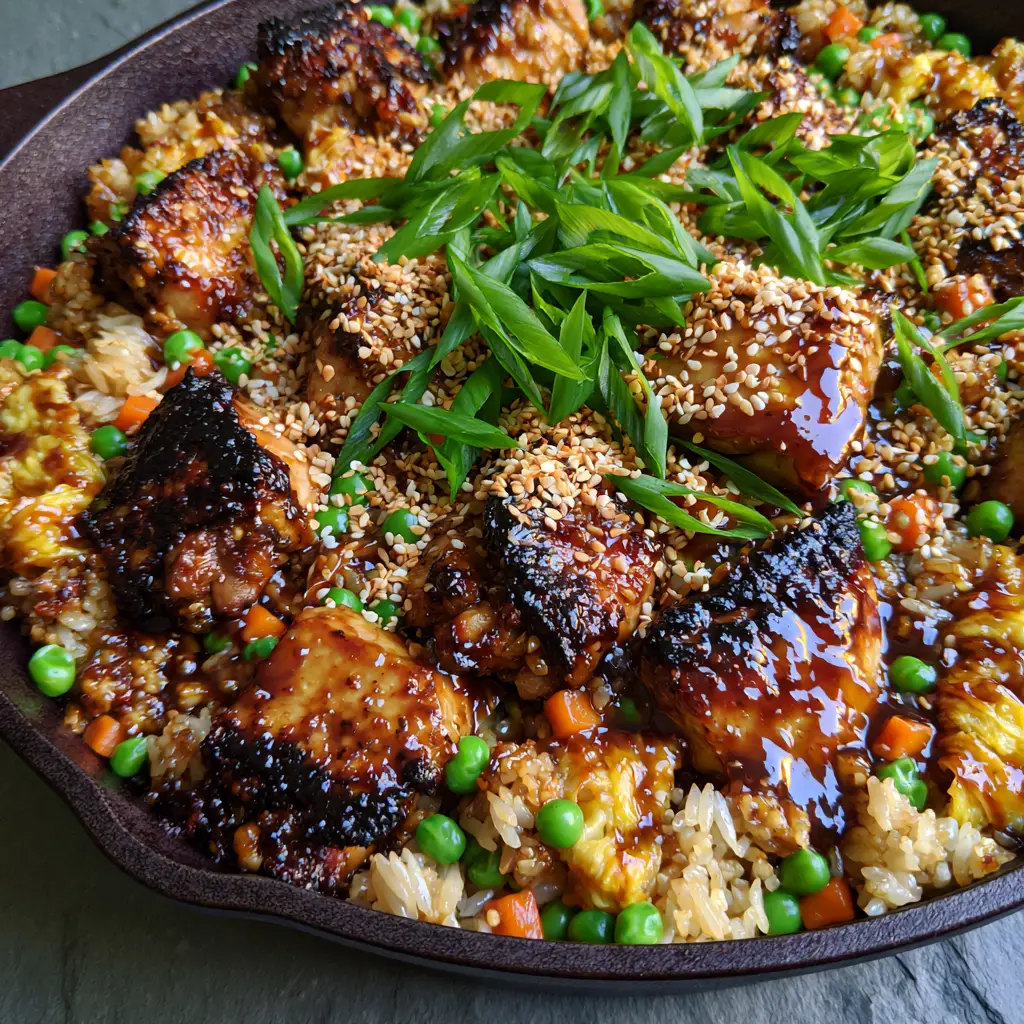
Use your spatula to break up any clumps. You want to hear a distinct “crackling” sound—this is the rice actually frying. Spread the rice out and let it sit for 1 minute at a time to develop toasted “socarrat” spots, which add immense flavor and texture.
The Art of the Skillet Stir-Fry
Toss in the green peas and the remaining teriyaki sauce. The rice should begin to take on a light brown hue while remaining individual and fluffy. Fold the seared chicken cubes and the egg ribbons back into the skillet.
Toss everything together for another 2 minutes. The residual heat will warm the peas through and allow the glossy glaze from the chicken to lightly coat the rice without making it soggy. You are looking for that “amber-toned” shimmer across the entire dish.
Chef’s Secrets for Restaurant-Quality Results
- Rinse Your Rice: If you are making rice specifically for this dish, rinse it 3-4 times before cooking to remove excess starch. This is the only way to ensure “individual grains.”
- The Sugar Factor: If your glaze isn’t thickening enough, a slurry of 1 tsp cornstarch and 1 tsp water can be added to the sauce, though the reduction method is preferred for flavor.
- Don’t Overcrowd: If your skillet is small, sear the chicken in two batches. Overcrowding leads to steaming, which prevents the “deep dark brown seared edges.”
- High Heat is Key: If you see smoke, you’re doing it right. Just be ready to move quickly!
Keeping It Fresh: Storage and Reheating
Teriyaki Chicken Fried Rice is excellent for meal prep. Store leftovers in an airtight container in the refrigerator for up to 3 days. To maintain the “fluffy” texture, reheat in a skillet with a teaspoon of water and a lid to create steam, rather than using a microwave which can toughen the chicken.
Freezing is possible for up to 1 month, though the texture of the peas and carrots may soften. Always thaw in the fridge overnight before reheating in a hot pan to regain that seared quality.
Perfect Pairings and Menu Inspiration
This dish is a powerhouse on its own, but it pairs beautifully with a light, acidic side. Consider serving it alongside a cucumber salad or a bowl of refreshing mango bingsu for dessert to cut through the rich teriyaki. For a full-scale feast, you could even serve it alongside sesame ginger tuna steak to lean into the Japanese-inspired flavors.
If you’re hosting a summer gathering, this rice fits perfectly into a 4th of July spread as a unique alternative to traditional sides. Pair it with a pineapple mango rum punch to lean into those tropical, sweet-and-savory vibes.
Frequently Asked Questions
Yes, but be careful not to overcook them. Thighs are preferred for Teriyaki Chicken Fried Rice because they stay juicy at high heat and develop a better caramelized crust.
No! A cast iron skillet is actually superior for many home stoves because it retains heat better than a thin wok, ensuring a deep sear on the chicken.
Cook the whisked eggs like a thin omelet in the skillet, roll it up once set, and then slice it crosswise into delicate ribbons before adding them back to the rice.
The gloss comes from the reduction of sugar and mirin. As the water evaporates, the sugars concentrate into a thick, shimmering amber-toned syrup that coats the chicken.
Mushy rice usually happens if the rice is freshly cooked and still holds too much moisture. Use cold, day-old jasmine rice for the best ‘individual grain’ results.
The Ultimate Teriyaki Chicken Fried Rice Recipe
Teriyaki Chicken Fried Rice with Seared Thighs and Glossy Glaze
Ingredients
Equipment
Method
- Whisk together the soy sauce, mirin, and brown sugar in a small bowl until sugar dissolves.
- Heat oil in a cast iron skillet over medium-high. Add chicken cubes in a single layer. Sear until dark brown edges form (4 mins). Add half the sauce, glaze until thick, and remove chicken.
- Wipe skillet, add a little oil, and pour in eggs. Cook until just set, roll, slice into ribbons, and set aside.
- Sauté carrots, garlic, and ginger. Add cold rice and fry for 5 minutes, pressing down to achieve crispy bits. Pour in remaining sauce.
- Fold in peas, chicken, and egg ribbons. Toss until the glaze is shimmering and everything is heated through.
- Top with sliced scallions and toasted sesame seeds directly in the skillet.
Notes
Ensure the skillet is piping hot before adding chicken to get that dark, glossy caramelization.
Closing & Call to Action
Mastering Teriyaki Chicken Fried Rice is about more than just following steps; it’s about managing heat and moisture to create a dish that is visually stunning and culinarily superior. The combination of dark, caramelized chicken and fluffy, distinct grains of rice creates a meal that is consistently satisfying. If you enjoyed this skillet guide, please leave a comment below and share your results! Don’t forget to follow us at Pinterest for more visually-driven recipe inspiration.