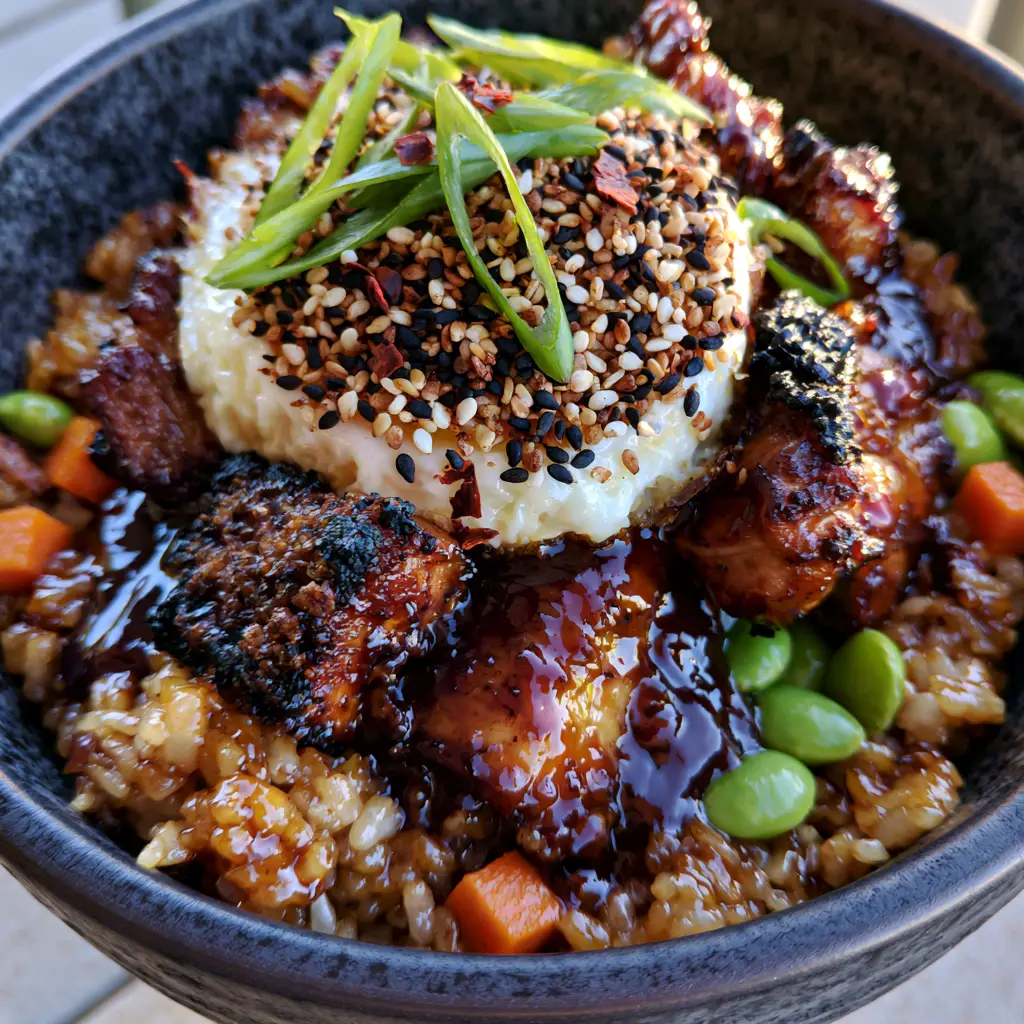
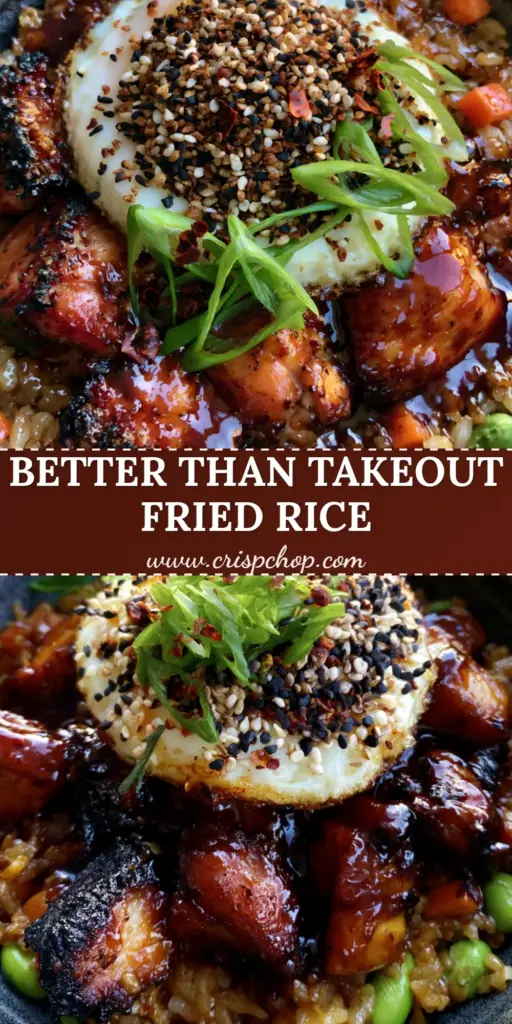
There is a specific kind of magic that happens when high heat meets a well-seasoned wok, and our Japanese BBQ Chicken Fried Rice is the crowning achievement of that culinary alchemy. Imagine succulent chunks of chicken thigh, seared until their edges are dark and crispy, then enveloped in a thick, mahogany-colored glaze that balances sweetness with a deep, savory punch. This isn’t your standard takeout; this is a masterclass in texture and flavor, designed to satisfy the most intense umami cravings.
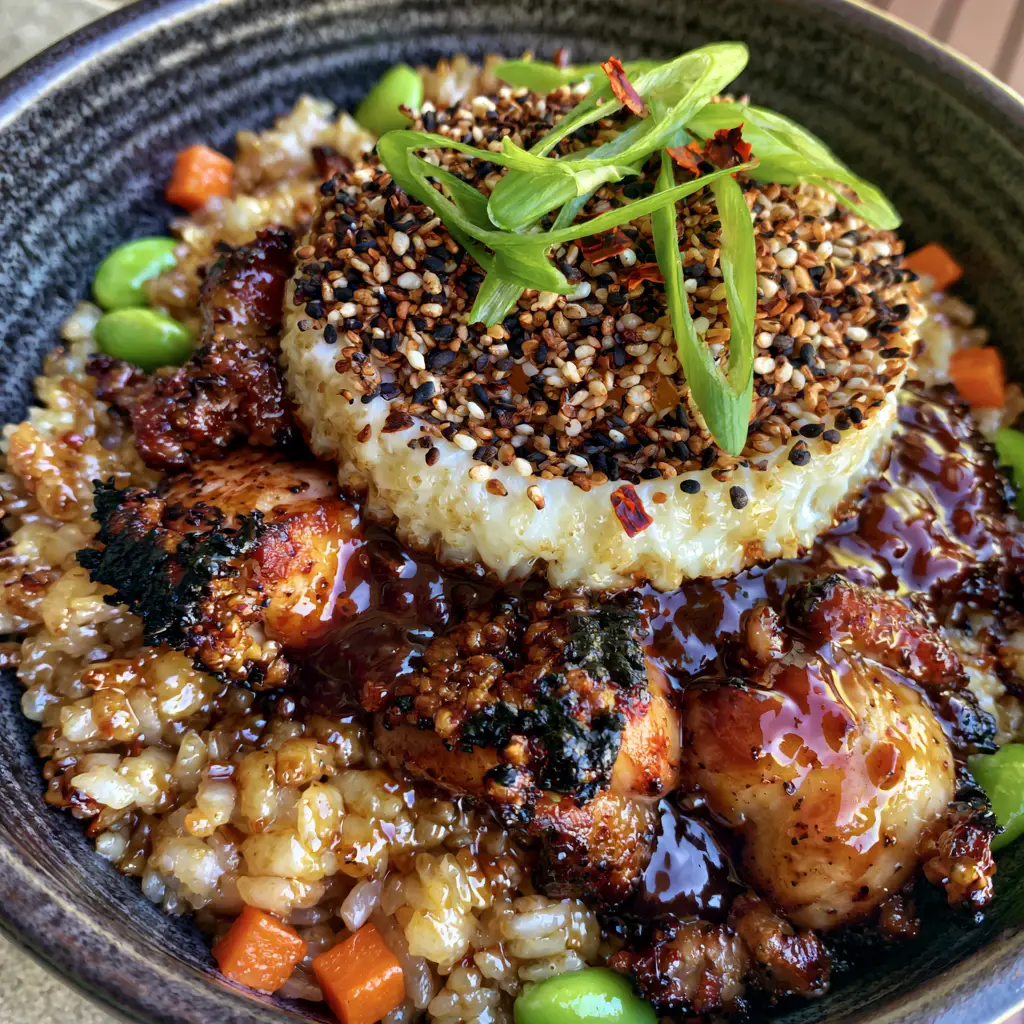
When you look at this dish, the first thing you notice is the visual contrast—the golden-brown, glistening short-grain rice serves as a vibrant canvas for bright green edamame and tiny orange cubes of tender carrots. But the real star is the crowning glory: a perfectly circular fried egg with a yolk so runny it acts as a secondary sauce, enriching every bite. Whether you are a fan of classic chicken fried rice or looking for something bolder, this recipe delivers an experience that is both authentic and elevated.
This recipe was developed to bridge the gap between professional hibachi-style cooking and the practicality of a home kitchen. By focusing on “culinary forensics”—analyzing the exact char on the meat and the sheen of the sauce—we have crafted a blueprint that ensures your final bowl looks and tastes exactly like a high-end bistro offering. Let’s dive into the science of why this Japanese-inspired comfort food works so well.
Why This Japanese BBQ Chicken Fried Rice Beats Takeout Every Time
- The Mahogany Glaze: Unlike thin, watery sauces, our Japanese BBQ glaze is glossy and thick, clinging to every charred crevice of the chicken thigh.
- Short-Grain Superiority: We use short-grain rice for its characteristic chew and ability to stay moist without becoming mushy, creating a “glistening” effect when tossed in the wok.
- The Perfect Char: By utilizing chicken thighs instead of breasts, we achieve those coveted crispy, dark edges that provide a smoky depth of flavor.
- Vibrant Textural Layers: From the snap of the steamed edamame to the crunch of toasted black and white sesame seeds, every mouthful offers a new sensory experience.
- Visual Masterpiece: With a heavy sprinkle of red chili flakes and fresh scallions, this dish is as stunning on the plate as it is delicious on the palate.
The Essential Building Blocks: Ingredients and Flavor Profiles
1 lb (450g) Boneless, Skinless Chicken Thighs: Thigh meat is non-negotiable for this recipe; the higher fat content allows the meat to withstand the high-heat searing required to get those “deeply seared charred edges” without drying out.
3 cups (600g) Cooked Short-Grain Rice (Day-Old): Using cold, day-old rice is the secret to the golden-brown color; the lower moisture content allows the grains to fry in the oil rather than steam, resulting in a distinct, non-clumpy texture.
1/2 cup (120ml) Japanese BBQ Sauce (Bachan’s style): This dark mahogany-colored sauce provides the base umami; it should be thick enough to glaze the meat, providing that “succulent” visual described in our blueprint.
1/2 cup (75g) Shelled Edamame: These bright green gems provide a burst of plant-based protein and a necessary color contrast against the dark chicken and golden rice.
1/2 cup (60g) Diced Carrots: Cut into small, uniform orange cubes, these are steamed slightly before frying to ensure they are tender yet hold their shape perfectly.
2 Large Eggs: One is scrambled into the rice for structure, while the second is fried sunny-side up to create that “perfectly circular” runny yolk topping.
2 tbsp (30ml) Neutral Oil: Use an oil with a high smoke point, like avocado or canola, to achieve the sear on the chicken without the oil breaking down or smoking excessively.
3 Scallions (Green Onions): Thinly sliced on a bias, these provide a sharp, fresh bite and a pop of bright green to finish the dish.
1 tsp (5g) Toasted White and Black Sesame Seeds: These add a nutty aroma and a sophisticated “handheld smartphone photo” aesthetic that makes the dish look professional.
1/2 tsp (1g) Dried Red Chili Flakes: A small amount adds a hint of heat and visual “interest” without overpowering the delicate balance of the BBQ sauce.
The Tool Kit: Achieving Professional Wok Char at Home
To recreate the “macro shot” quality of this Japanese BBQ Chicken Fried Rice, you need the right tools. A heavy-bottomed carbon steel wok or a large cast-iron skillet is essential for heat retention. These materials allow the rice to achieve that “golden-brown” glisten by maintaining a consistent temperature even when cold ingredients are added.
A sharp Chef’s knife is required for the “diced cooked carrots” and “thinly sliced bright green scallions,” ensuring clean edges that look beautiful in a top-down photo. Finally, a non-stick pan is recommended specifically for the fried egg, allowing you to achieve that “perfectly circular” shape with a “slightly runny yolk” without the edges becoming overly jagged or stuck to the surface.
Step-by-Step: Crafting the Perfect Japanese BBQ Chicken Fried Rice
Phase 1: Searing the Chicken to Mahogany Perfection
Heat 1 tbsp (15ml) of oil in your wok over medium-high heat until it just begins to shimmer. Add your chicken thigh chunks in a single layer, resisting the urge to move them for at least 3 minutes. This patience is what creates the “charred crispy edges” seen in our visual blueprint.
Once the bottom is deeply seared, flip the chicken and cook for another 2 minutes. Pour in half of the Japanese BBQ sauce and toss vigorously. The sugars in the sauce will caramelize almost instantly, creating a “thick, glossy, dark mahogany-colored” glaze that coats each succulent piece of meat.
Phase 2: Frying the Rice for Glistening Results
Remove the chicken from the wok and set aside. Add the remaining oil and the cold short-grain rice. Use a spatula to break up any clumps, pressing the rice against the hot sides of the wok. Listen for the “sizzle and pop”—this is the sound of the rice grains frying and turning that beautiful golden-brown color.
Add the diced carrots and steamed edamame. These should be “small, vibrant orange” and “bright green,” respectively. Push the rice to the side, crack one egg into the center, and scramble it quickly before folding it back into the rice mixture. This adds richness and helps the other ingredients adhere to the grains.
Phase 3: The Final Toss and Assembly
Return the glazed chicken to the wok and add the remaining BBQ sauce. Toss everything together for 60 seconds until the rice is “glistening” and the flavors are fully integrated. Season with a pinch of salt if needed, though the BBQ sauce usually provides ample sodium. Move the rice to your “dark, textured charcoal ceramic bowl.”
Phase 4: The Signature Runny Egg Topping
In a small non-stick pan, fry the second egg over medium heat. To get that “perfectly circular” look, you can use a silicone egg ring or simply pour the egg gently into the center of the pan. Cook until the whites are set but the yolk remains “slightly runny.” Carefully slide this on top of your fried rice pile.
Phase 5: Forensic Finishing Touches
Now, we match the Midjourney visual prompt exactly. Apply a “heavy sprinkle” of toasted black and white sesame seeds. Add the “thinly sliced bright green scallions” and a few “red chili flakes” for a pop of color. The final result should look like a “handheld smartphone photo” from an authentic food blog, glowing under “soft, diffused natural morning light.”
Secret Techniques for Crispy Seared Chicken Edges
- Dry Your Meat: Use a paper towel to pat the chicken thighs completely dry before seasoning. Moisture is the enemy of a good sear; dry meat browns, while wet meat steams.
- Don’t Overcrowd the Pan: If you add too much chicken at once, the temperature of the wok will drop. Cook in batches if necessary to ensure those “charred crispy edges” form properly.
- The “Cold Rice” Rule: If you don’t have day-old rice, spread freshly cooked rice on a baking sheet and put it in the freezer for 15 minutes. This mimics the dehydration process of overnight refrigeration.
- High Heat is Key: Fried rice is a fast process. Keep your burner on high and keep the ingredients moving once the initial sear is achieved to prevent burning while maintaining that “golden-brown” glisten.
Keeping Your Fried Rice Fresh: Storage and Reheating
This Japanese BBQ Chicken Fried Rice stores remarkably well, making it an excellent candidate for meal prep. Place leftovers in an airtight container and refrigerate for up to 3 days. Because we used chicken thighs, the meat will remain juicy even after reheating, unlike leaner cuts.
To reheat, we recommend avoiding the microwave if possible. Instead, add a teaspoon of water or a splash of coconut rice liquid to a pan over medium heat. Add the rice and toss until heated through. This restores the “glossy” texture of the BBQ sauce and prevents the rice from drying out. If you must microwave, cover the bowl with a damp paper towel to create a mini-steam chamber.
Complete the Meal: Perfect Pairings and Sides
While this bowl is a complete meal on its own, you can elevate the experience by pairing it with other Asian-inspired favorites. If you’re looking for more protein, consider serving this alongside a sesame ginger tuna steak or a perfectly seared tuna steak. The brightness of the ginger will cut through the richness of the BBQ sauce.
For those who love a variety of textures, try adding a side of sweet teriyaki chicken fried rice for a side-by-side flavor comparison. If you want a spicy kick, a small portion of thai basil chicken fried rice adds a wonderful herbaceous notes to your table spread.
Common Questions About This Japanese Fusion Bowl
While possible, chicken thighs are highly recommended. They have more fat, which allows for better charring and ensures the meat stays succulent and moist under high heat.
The secret is the ‘mahogany glaze’—the sugar content in the BBQ sauce caramelizes rapidly. Let the chicken sear undisturbed on high heat before adding the sauce to lock in the texture.
Short-grain rice, specifically sushi rice, is ideal. Its higher starch content provides a chewy texture and allows the grains to glisten when tossed with the BBQ sauce.
Most major grocery stores carry Bachan’s Japanese BBQ sauce in the international aisle. You can also make a quick version using soy sauce, mirin, ginger, and brown sugar.
Mushiness usually comes from using freshly cooked rice that contains too much moisture. Always use day-old rice or chill fresh rice in the freezer for 15 minutes to dry it out.
The Ultimate Japanese BBQ Chicken Fried Rice Recipe Card
Japanese BBQ Chicken Fried Rice: The Ultimate Umami-Packed Weeknight Dinner
Ingredients
Equipment
Method
- Heat oil in a wok. Add chicken thighs and sear without moving for 3 minutes to develop charred crispy edges. Flip and cook for 2 more minutes.
- Add 1/4 cup of the BBQ sauce to the chicken. Toss until the sauce is a thick, dark mahogany glaze. Remove chicken from wok.
- Add remaining oil and cold rice to the wok. Fry until golden-brown and glistening. Fold in diced carrots and steamed edamame.
- Push rice aside, crack one egg into the center, scramble quickly, and then incorporate back into the rice mixture.
- Return chicken to the wok with remaining sauce. Toss until glossy and hot. Transfer to a charcoal ceramic bowl.
- In a separate pan, fry the second egg sunny-side up until the yolk is slightly runny. Place on top of the rice.
- Heavy sprinkle of sesame seeds, sliced scallions, and red chili flakes before serving.
Notes
Ensure the chicken is patted dry for the best crispy edges.
Wrapping Up: Your Path to Fried Rice Mastery
Creating the perfect bowl of Japanese BBQ Chicken Fried Rice is about more than just mixing ingredients; it’s about mastering the “Visual Recipe Blueprint”—the char of the chicken, the runniness of the egg, and the glisten of the rice. This dish is a testament to how simple ingredients, when treated with professional technique, can become a restaurant-quality masterpiece in your own kitchen.
We hope this recipe becomes a staple in your home. If you enjoyed making this, please leave a comment below and let us know how your char turned out! Don’t forget to sign up for our newsletter for more elite culinary guides and share your beautiful creations on Pinterest. Happy cooking!