The viral sushi bake has officially taken over the internet, and for good reason. It transforms the delicate flavors of a classic sushi roll into a warm, comforting, and incredibly sharable casserole that is perfect for weeknight dinners or potluck gatherings.
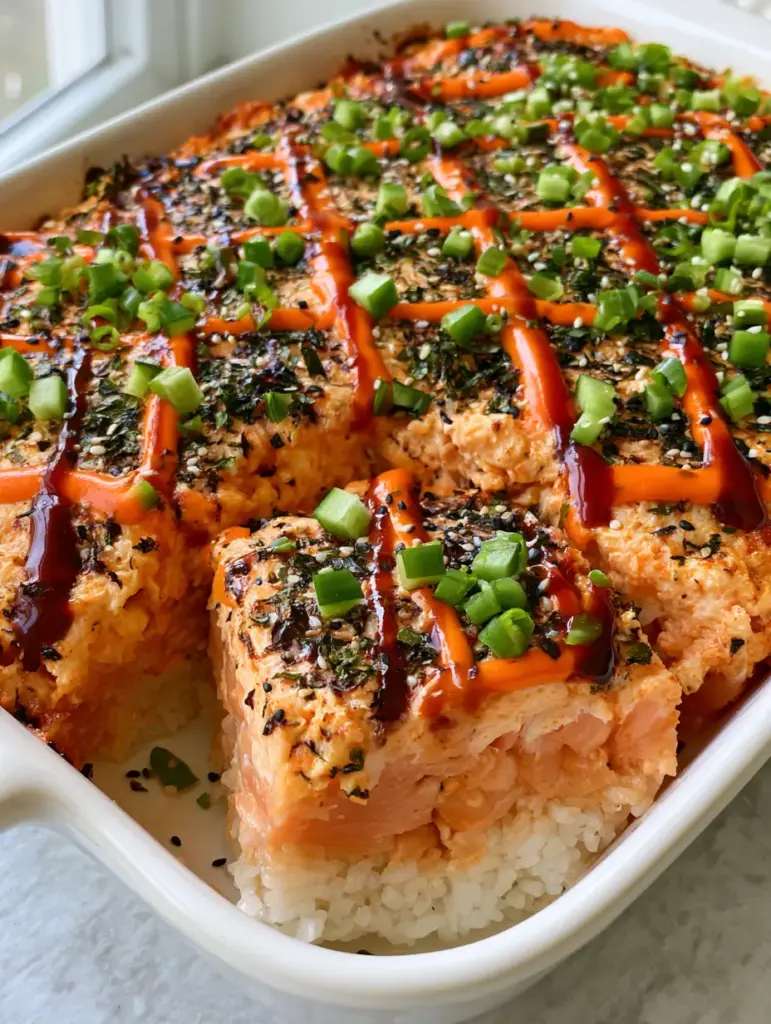
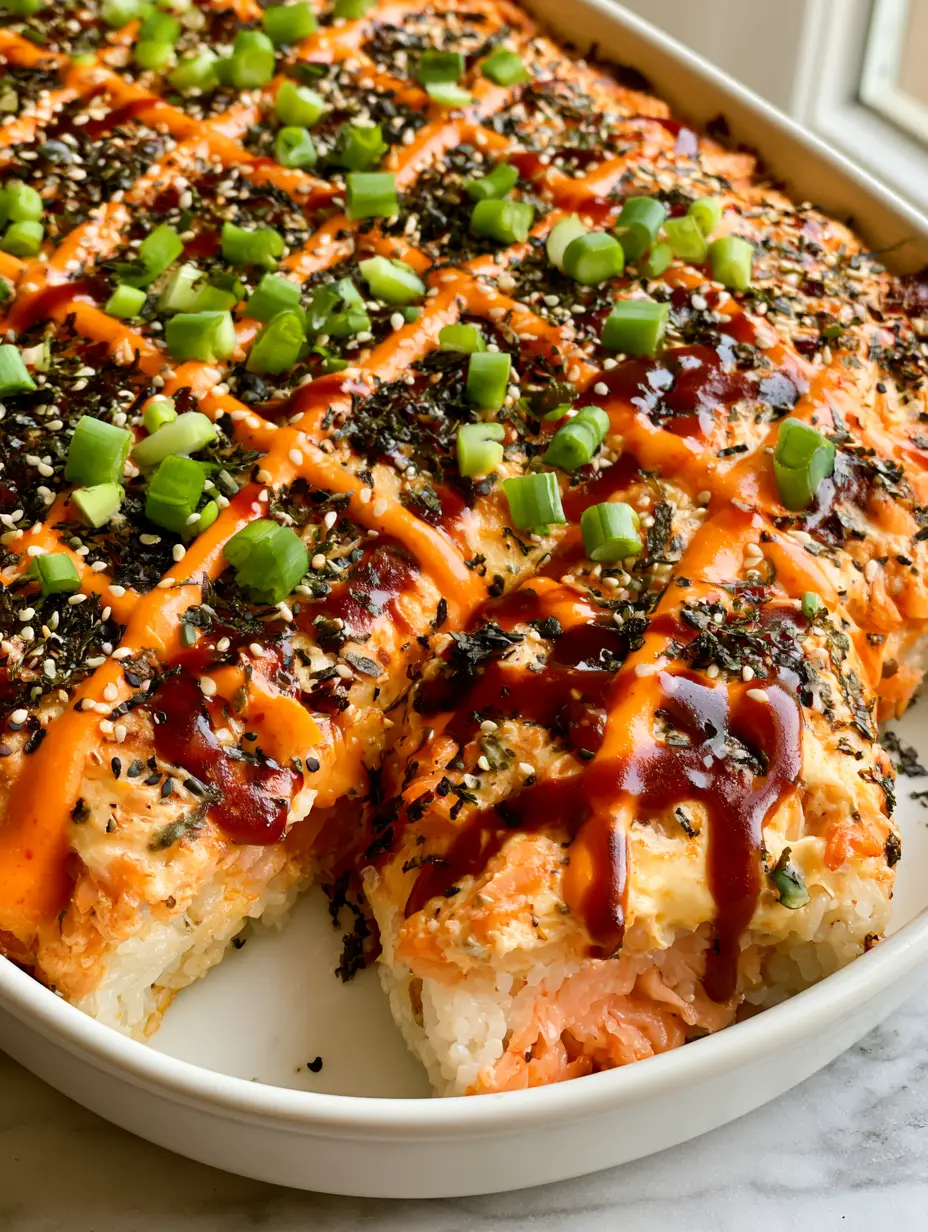
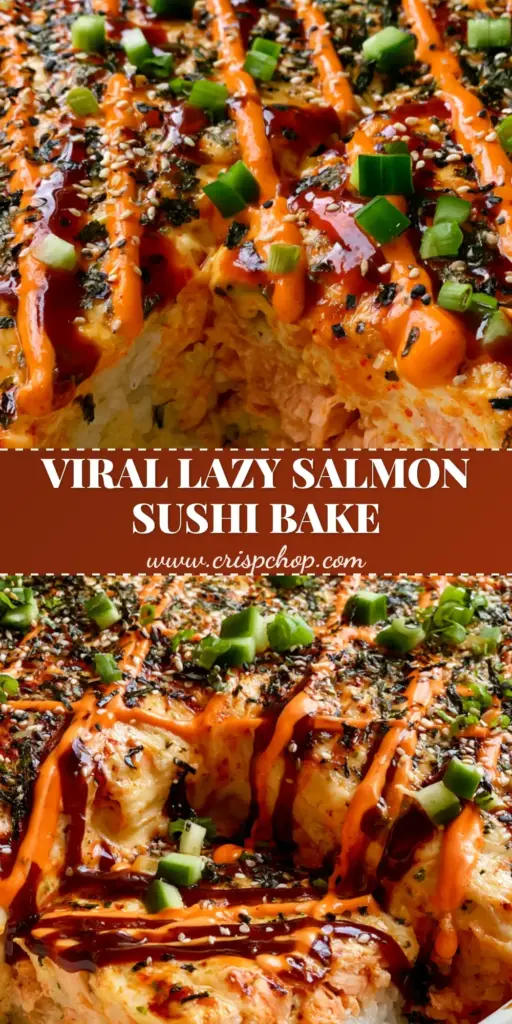
Imagine a base of perfectly seasoned, pearly white sushi rice topped with a luscious layer of flaked salmon and melted cream cheese. This dish isn’t just about flavor; it’s a visual masterpiece, characterized by a vibrant criss-cross pattern of spicy mayo and glossy unagi sauce.
Whether you are a seasoned home cook or a beginner looking for a “wow” dish, this sushi bake delivers a high-end food styling experience right in your own kitchen. Let’s dive into how to achieve those professional textures and bold, umami-rich layers.
Why You’ll Love This Savory Salmon Sushi Bake
- Textural Harmony: Experience the contrast between the soft, seasoned rice and the golden-brown, creamy salmon topping.
- Visual Appeal: The precise drizzle of bright orange sriracha mayo and dark unagi sauce creates a restaurant-quality finish.
- Flavor Explosion: Every bite is packed with savory salmon, tangy rice vinegar, and a refreshing crunch from fresh cucumber.
- Crowd-Pleasing Style: Much like a spicy tuna rice bowl, this dish is designed to be scooped up and enjoyed with nori sheets.
Essential Components for a Viral-Worth Casserole
To achieve the specific “viral” look from our visual blueprint, each ingredient serves a structural and aesthetic purpose. We aren’t just making a meal; we are building a culinary cross-section.
Short-Grain Sushi Rice: You need 3 cups (600g) of cooked rice. The high starch content ensures the base stays together when you lift out a square serving.
Fresh Salmon Fillets: Use 1 lb (450g) of salmon. Once baked and flaked, it provides the “juicy pink” filling seen in the cross-section of the dish.
Kewpie Mayo: 1/2 cup (120ml) of this Japanese staple is non-negotiable. It is richer and sweeter than American mayo, providing that signature creamy mouthfeel.
Cream Cheese: 4 oz (115g) of softened cream cheese acts as the binder for the salmon, creating a decadent, spreadable layer.
Unagi (Eel) Sauce: This 1/4 cup (60ml) of dark, syrupy sauce provides the “glossy dark brown” contrast against the spicy mayo.
Sriracha: 2 tbsp (30ml) mixed with mayo creates the “bright orange” drizzle that defines the top layer.
Garnish Medley: You’ll need toasted sesame seeds, shredded nori seaweed, and 1/2 cup (75g) of finely diced fresh cucumber for that emerald green pop of color.
Equipment Needed for Professional Styling
To recreate the handheld smartphone photo look, use a white ceramic baking dish (9×13 inch / 23×33 cm). The white ceramic makes the colors of the salmon and scallions pop beautifully.
You will also need squeeze bottles for the “precise criss-cross pattern” of the sauces. A sharp chef’s knife is essential for the “tiny uniform cubes” of fresh cucumber and “finely chopped” green scallions.
Step-by-Step Instructions for the Perfect Sushi Bake
Step 1: Preparing the Seasoned Rice Base
Start by rinsing your sushi rice until the water runs clear. Cook the rice according to package instructions, then while still warm, fold in 3 tbsp (45ml) rice vinegar, 1 tbsp (12g) sugar, and 1 tsp (6g) salt.
Press the seasoned rice firmly into the bottom of your white ceramic dish. Ensure the layer is even and compact; this provides the “thick, clean cross-section” when served.
Step 2: Creating the Creamy Salmon Filling
Season your salmon with a pinch of salt and bake at 400°F (200°C) for 12-15 minutes until it flakes easily with a fork. In a large bowl, combine the flaked salmon, softened cream cheese, and 1/4 cup (60ml) of Kewpie mayo.
Mix until well-incorporated but still chunky. Spread this mixture evenly over the rice base. This creates the “juicy pink salmon filling” that stays moist even after the second bake.
Step 3: The Second Bake for Golden Texture
Place the dish back into the oven at 425°F (220°C) for 10-12 minutes. Look for the edges to start bubbling and the top layer to turn a light golden-brown.
If you prefer a more “blistered” look, you can broil the top for the final 2 minutes. Watch closely to ensure the mayo mixture doesn’t burn.
Step 4: Artful Drizzling and Garnishing
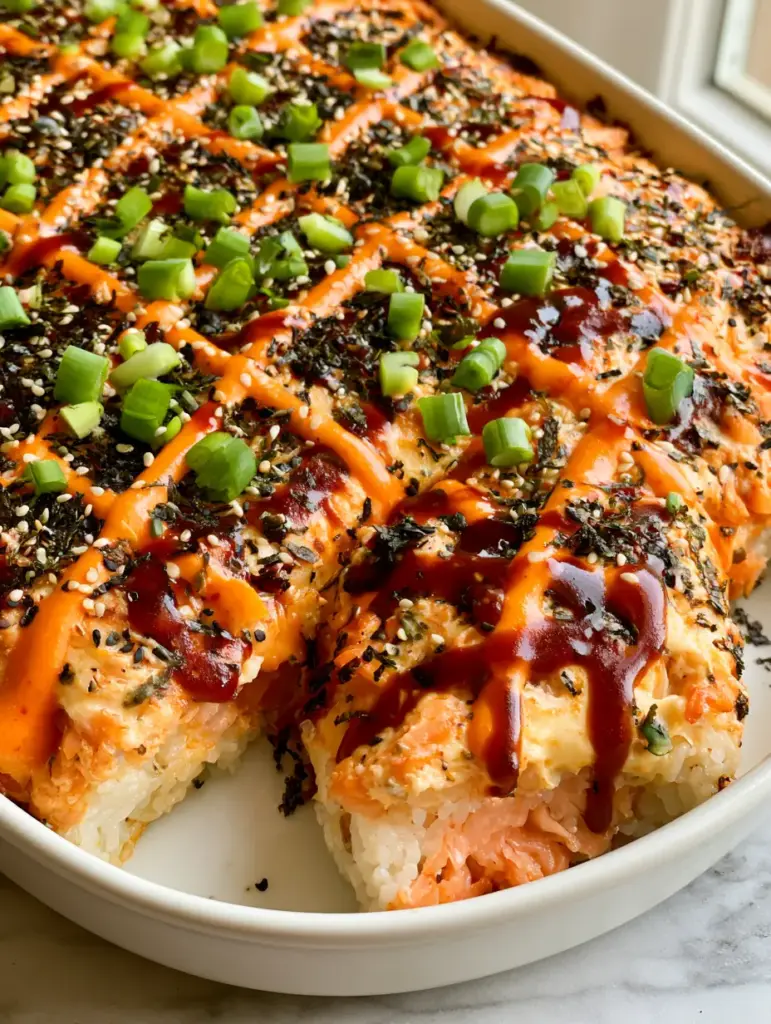
This is the “Forensic Visual” step. Using your squeeze bottles, draw diagonal lines of sriracha mayo across the dish, then repeat in the opposite direction with the unagi sauce.
Heavily garnish the surface with a dusting of black and white sesame seeds and shredded nori seaweed flakes. Finally, scatter the vibrant green scallions and the uniform cubes of fresh cucumber over the top for a fresh finish.
Expert Tips for Culinary Success
- Cool the Rice: Let the rice cool slightly before adding the salmon layer to prevent the bottom from becoming soggy.
- The “Clean Cut” Secret: To get that perfect square serving seen in the photos, let the sushi bake rest for 5-10 minutes before slicing.
- Uniform Dicing: For the cucumber, peel the skin but leave a little green for color, then dice into 1/4 inch (6mm) cubes for that professional look.
- Sauce Consistency: If your unagi sauce is too thick, warm it slightly so it flows smoothly from the squeeze bottle.
Storage, Reheating, and Make-Ahead Advice
This dish is best served immediately to maintain the contrast between the warm rice and cold, crunchy cucumber. However, you can store leftovers in an airtight container in the fridge for up to 2 days.
To reheat, place a portion in the oven or air fryer at 350°F (175°C) until warmed through. Avoid microwaving if possible, as it can make the rice chewy and the cucumber limp. Always add fresh cucumber and scallions *after* reheating.
What to Serve With This Sushi Bake
While this is a complete meal on its own, you can expand your spread with other Asian-inspired favorites. Try serving it alongside a teriyaki chicken recipe for extra protein variety.
If you enjoy the fusion of rice and bold sauces, you might also like a Korean BBQ meatball rice bowl. For a lighter side, a simple cucumber salad or dumpling sauce with steamed gyoza works perfectly.
Frequently Asked Questions
You can assemble the rice and salmon layers up to 24 hours in advance. However, do not bake it or add the fresh garnishes (cucumber and scallions) until you are ready to serve to keep the textures fresh.
Yes, you can use canned salmon or even imitation crab (surimi) for a more budget-friendly version. Just ensure you drain the canned salmon well before mixing it with the mayo and cream cheese.
While you can use regular mayo, Kewpie mayo is highly recommended. It uses only egg yolks and rice vinegar, giving it a much richer, umami-forward flavor that is characteristic of this dish.
The most popular way to enjoy a sushi bake is to scoop a small portion onto a small rectangular sheet of roasted nori (seaweed). You can then fold it like a mini taco and eat it in one or two bites.
This usually happens if you use long-grain rice or don’t season it correctly. Short-grain sushi rice is essential because its starchiness helps the base stick together. Be sure to press the rice firmly into the dish.
The Viral Salmon Sushi Bake Recipe Card
Sushi Bake: The Ultimate Creamy Salmon Casserole with a Viral Sriracha Drizzle
Ingredients
Equipment
Method
- Fold vinegar, sugar, and salt into warm cooked rice. Press firmly into the white ceramic baking dish.
- Bake salmon until flaky. Combine with cream cheese and Kewpie mayo. Spread over the rice layer.
- Bake the assembled dish at 425°F (220°C) for 10-12 minutes until the top is golden-brown and bubbling.
- Use squeeze bottles to create a criss-cross pattern with sriracha mayo and unagi sauce.
- Top with sesame seeds, shredded nori, diced cucumber, and scallions before serving.
Notes
Always add the fresh cucumber last to keep it crunchy.
Closing & Call to Action
This sushi bake is more than just a trend; it is a foolproof way to enjoy the complex flavors of sushi in a comforting, warm format. The combination of the creamy salmon, tangy rice, and crunchy garnishes creates a sensory experience that is hard to beat.
Did you try this recipe? We’d love to see your “criss-cross” sauce skills! Leave a comment below and let us know your favorite toppings. Don’t forget to follow us on Pinterest and share your creations!