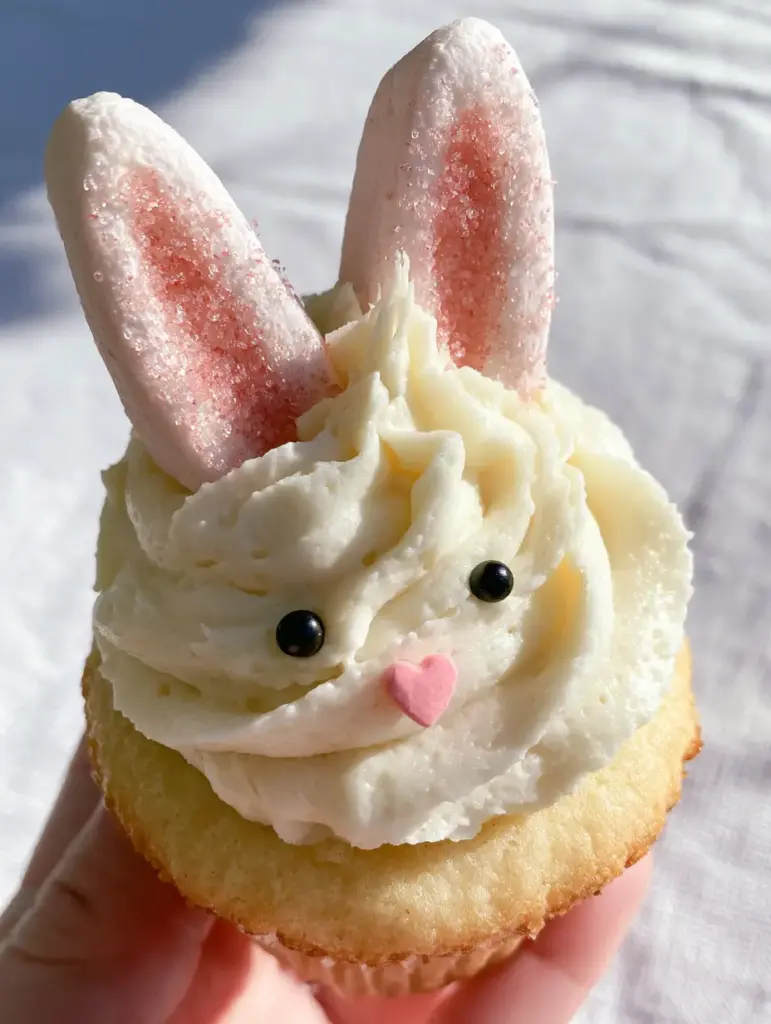
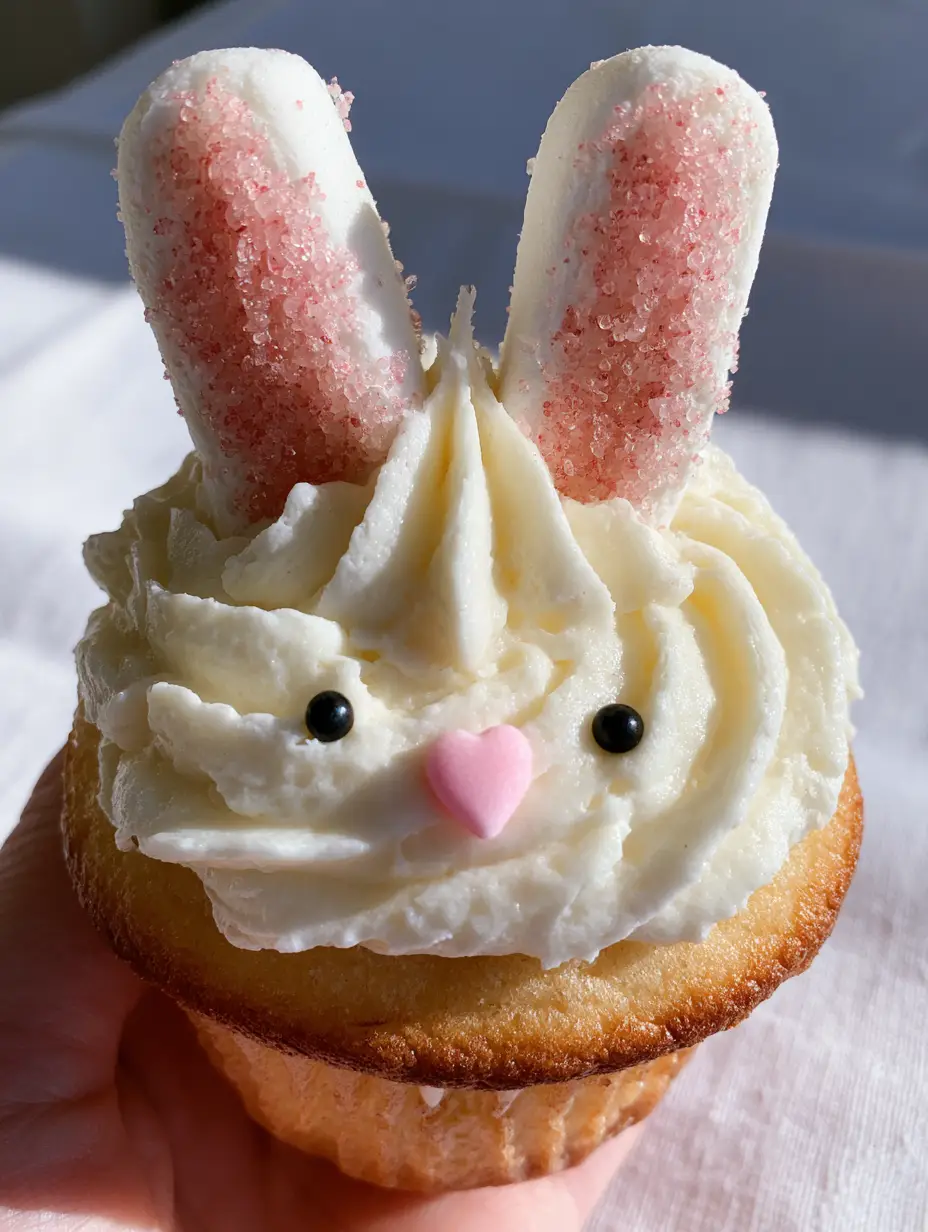
There is nothing quite like the charm of homemade Bunny Cupcakes to signal the arrival of spring. Whether you are hosting an Easter brunch or simply looking for a weekend project with the kids, these treats offer a perfect blend of professional aesthetics and whimsical fun. The visual of a high, snowy white buttercream swirl topped with sparkling pink ears is enough to brighten any kitchen counter.
Imagine holding a golden, moist cupcake in your hand, the soft morning sunlight catching the shimmer of rose-pink sanding sugar. The Bunny Cupcakes we are creating today are designed to look exactly like a handheld smartphone photo from a high-end food blog: authentic, textured, and irresistibly cute. We aren’t just baking; we are engineering a centerpiece that tastes even better than it looks.
By following this guide, you will master the art of the perfect vanilla crumb and the structural secrets of marshmallow ear placement. These Bunny Cupcakes are more than just a recipe; they are a memory in the making, wrapped in a classic white paper liner and topped with a heart-shaped nose.
Why You Will Love These Whimsical Bunny Cupcakes
- Visual Texture: The contrast between the fluffy “fur” frosting and the sparkling sanding sugar ears creates a professional, multi-dimensional look.
- Moist Golden Crumb: A scientific balance of fats ensures the vanilla base remains tender for days, unlike dry box mixes.
- Kid-Friendly Assembly: While the baking requires precision, the decorating phase is perfect for little hands to help with the “eyes” and “noses.”
- Accessible Elegance: We use simple grocery store staples like large marshmallows and pearl sprinkles to achieve a high-end bakery result.
The Anatomy of the Perfect Golden Vanilla Base
To achieve the “moist golden vanilla cupcake base” specified in our blueprint, we must focus on the science of aeration and emulsification. This isn’t just a basic yellow cake; it’s a structured sponge designed to hold the weight of a heavy buttercream swirl.
All-Purpose Flour: 1.5 cups (190g). This provides the essential gluten structure. Ensure you spoon and level your flour to avoid a dense, dry cupcake.
Granulated Sugar: 1 cup (200g). Sugar does more than sweeten; it breaks up gluten strands to keep the crumb tender and aids in the “golden” browning through caramelization.
Unsalted Butter: 0.5 cups (115g), softened. Butter provides that classic rich flavor. Using unsalted allows us to control the sodium levels perfectly for a clean finish.
Large Eggs: 2 units, room temperature. Eggs provide structure and leavening. Room temperature eggs emulsify much better with the fat, ensuring a smooth batter.
Whole Milk: 0.5 cups (120ml). Milk adds moisture and creates a soft, velvety texture within the Bunny Cupcakes base.
Pure Vanilla Extract: 1.5 tsp (7ml). Since vanilla is the primary flavor profile, use high-quality extract or vanilla bean paste for those beautiful tiny flecks.
Baking Powder: 1.5 tsp (6g). This is our primary leavening agent. It reacts with heat to create the “high” rise needed to support our frosting.
Fine Sea Salt: 0.25 tsp (1.5g). Salt is a flavor enhancer that balances the sweetness of the buttercream and the marshmallow ears.
Engineering the Snowy White Vanilla Buttercream
The “high, fluffy swirl of snowy white vanilla buttercream” requires a high ratio of fat to sugar and a specific whipping technique to incorporate air without creating large bubbles.
Unsalted Butter (for frosting): 1 cup (225g), slightly cool but pliable. Using butter that is too warm will cause the swirl to collapse under the weight of the marshmallow ears.
Powdered Sugar: 3-4 cups (360-480g). Sift this twice to ensure there are no lumps that could clog your piping tip.
Heavy Cream: 2 tbsp (30ml). This adds a luxurious silkiness to the frosting, making it look like “snowy” peaks.
Clear Vanilla Extract: 1 tsp (5ml). Using clear vanilla is a professional secret to keeping the frosting “snowy white” rather than slightly off-white or ivory.
Essential Decorations for the Bunny Face
Large Marshmallows: 12 units. These are the “raw material” for the ears. We will cut them diagonally to create that long, pointed bunny ear shape.
Rose-Pink Sanding Sugar: 0.25 cups (50g). The “sticky centers” of the marshmallows will be pressed into this sugar to create the inner ear color.
Black Pearl Sprinkles: 24 units. These tiny spheres form the eyes, giving the Bunny Cupcakes a classic, minimalist look.
Pink Heart Sprinkles: 12 units. A single heart-shaped sprinkle serves as the nose, positioned just below the eyes for maximum cuteness.
White Paper Cupcake Liners: 12 units. A clean, neutral liner ensures the focus remains entirely on the golden cake and the intricate decorations.
Tools for Food-Blogger Quality Results
To replicate the handheld, high-resolution look of our Bunny Cupcakes, you will need a few specific kitchen tools. A standard 12-cup muffin tin is essential, lined with those crisp white papers.
A stand mixer or electric hand mixer is non-negotiable for the buttercream. You need the mechanical power to whip the butter until it turns from yellow to a pale white. For the piping, a large open star tip or a simple large round tip will create that “high, fluffy swirl” seen in the prompt.
Finally, keep a pair of sharp kitchen shears nearby. These are the best tool for cutting marshmallows cleanly without squishing the delicate foam structure. If you enjoy precision in your baking, you might also find that making French bread helps hone your dough-handling skills for future projects.
Step-by-Step Instructions: Creating the Bunny Cupcakes
1. Preparing the Golden Vanilla Base
Preheat your oven to 350°F (175°C). Line a 12-cup muffin tin with white paper liners. In a medium bowl, whisk together the flour, baking powder, and salt.
In your stand mixer, cream the softened butter and granulated sugar on medium-high speed for 3-5 minutes. Look for a visual cue: the mixture should turn pale and look significantly “fluffier” than when you started. Add the eggs one at a time, followed by the vanilla extract.
Reduce speed to low. Alternately add the dry ingredients and the milk, starting and ending with the flour. Mix only until just combined. Over-mixing at this stage will lead to a tough cupcake rather than a “moist golden” one. If you love this texture, you’ll also enjoy the crumb of our classic carrot muffins.
2. Baking to Golden Perfection
Divide the batter evenly among the 12 liners, filling each about two-thirds full. Bake for 18-22 minutes. To check for doneness, look for a light golden-brown edge and a center that springs back when gently pressed. Remove from the oven and transfer to a wire rack to cool completely. The cupcakes must be cold to the touch before frosting, or the “snowy white” buttercream will melt.
3. Whipping the Snowy White Frosting
Beat the slightly cool butter for 5 full minutes until it is nearly white in color. Gradually add 3 cups of sifted powdered sugar on low speed. Once incorporated, add the heavy cream and clear vanilla. Increase the speed to high and whip for another 2 minutes. The result should be a stiff but airy frosting that holds a peak.
4. The Marshmallow Ear Anatomy
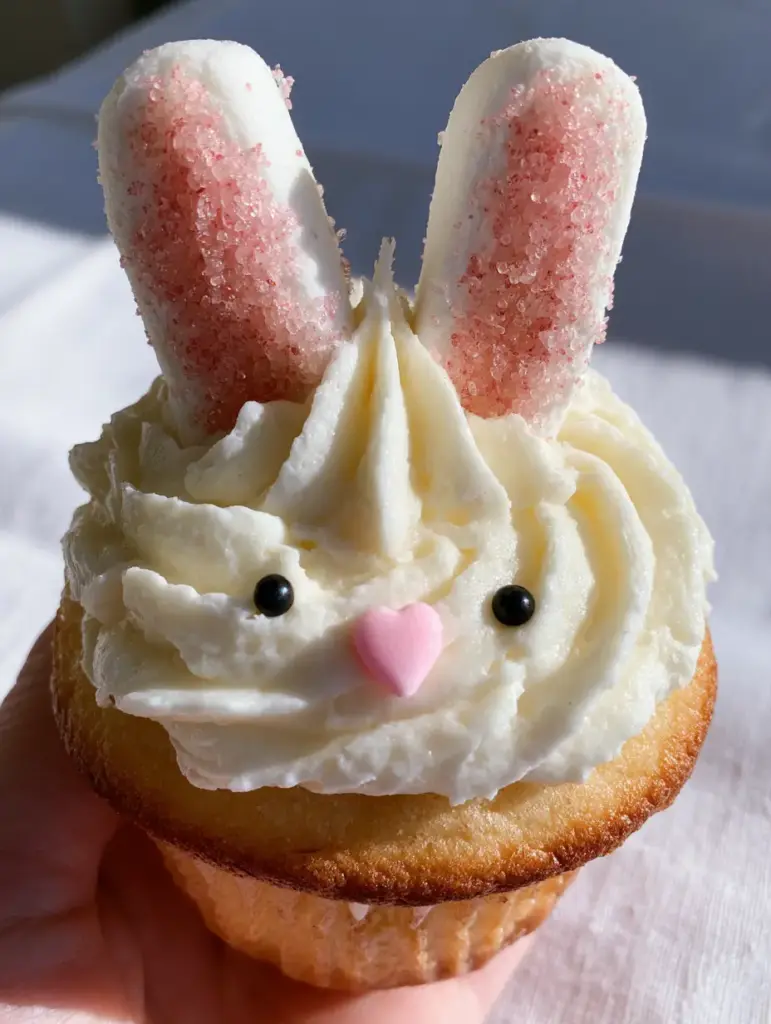
While the cupcakes cool, prepare the bunny ears. Take a large marshmallow and, using kitchen shears, cut it diagonally from one top corner to the opposite bottom corner. This creates two long, teardrop-shaped pieces. Immediately press the sticky, cut side of the marshmallow into the pink sanding sugar. The sugar will adhere only to the sticky part, creating a perfect “inner ear” look.
5. Assembling the Bunny Face
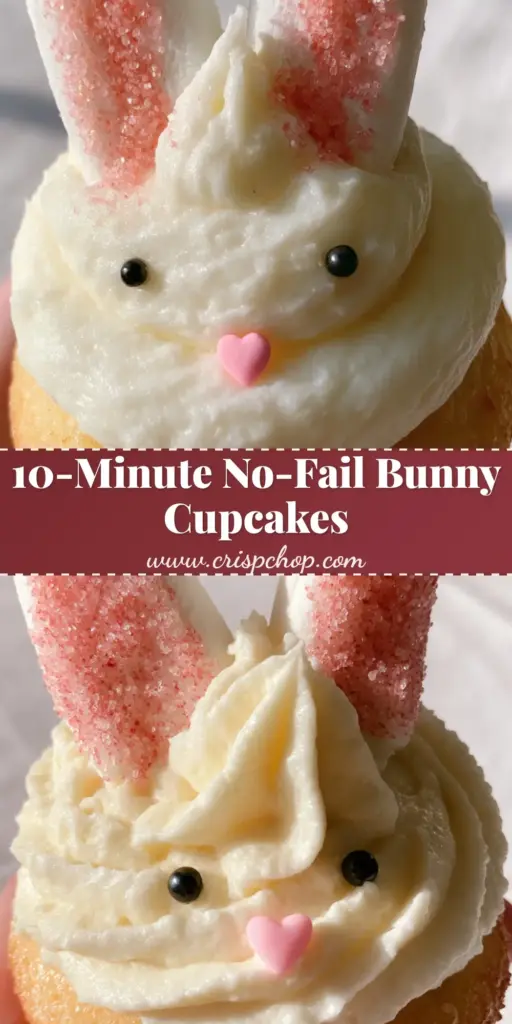
Pipe a high, thick swirl of buttercream onto each cupcake. Start from the outside and spiral inward and upward to create height. Insert two marshmallow ears into the top of the frosting, standing them upright. Place two black pearl sprinkles in the center for the eyes and one pink heart sprinkle just below them for the nose. The Bunny Cupcakes are now complete!
Expert Tips for Success
- Stickiness Solution: If your marshmallows are sticking to the shears, dip the blades in a little powdered sugar between cuts.
- Frosting Stability: If your kitchen is warm, chill the frosting for 10 minutes before piping to ensure those “high swirls” don’t sag.
- Sugar Precision: Use a small bowl for the sanding sugar so you can press the entire sticky surface of the marshmallow ear in one motion.
- Sourcing Sprinkles: If you can’t find heart sprinkles, a small pink jelly bean or a tiny dot of pink frosting works as a great substitute for the nose.
Storage, Reheating & Freezing
Bunny Cupcakes are best enjoyed the day they are made, especially to maintain the texture of the marshmallow ears. However, they can be stored in an airtight container at room temperature for up to 2 days. If you need to store them longer, move them to the refrigerator for up to 4 days, but note that the marshmallows may become slightly tough.
We do not recommend freezing the fully decorated cupcakes, as the sanding sugar may bleed into the frosting upon thawing. You can, however, freeze the unfrosted vanilla bases for up to 3 months. Simply thaw at room temperature and decorate fresh.
What to Serve With These Easter Treats
These Bunny Cupcakes are the star of the show, but they pair beautifully with other spring-themed items. For a balanced brunch, serve them alongside a savory Greek chicken grain bowl to offset the sweetness. If you are hosting a morning tea, these cupcakes complement the light, refreshing notes of a strawberry acai refresher perfectly.
If you’re looking for more finger foods to round out your party spread, consider adding some cold stuffed mini peppers for a pop of color and a healthy crunch that balances the decadent buttercream.
Frequently Asked Questions
Yes! They are a festive, nut-free option (always check your specific ingredient labels) that children find incredibly appealing. The white paper liners also make them easy to handle.
You can bake the bases a day ahead. However, for the best visual result, assemble the marshmallow ears and frosting on the day of serving to prevent the sugar from bleeding or the marshmallows from drying out.
Ensure your buttercream is stiff enough by using cool butter and enough powdered sugar. Push the marshmallow ears deep into the frosting swirl to provide structural support.
Use clear vanilla extract instead of dark brown extract. Additionally, whip the butter alone for at least 5 minutes before adding sugar to aerate it and lighten the color naturally.
You can easily make your own by mixing 1/4 cup of granulated sugar with one tiny drop of pink or red gel food coloring in a jar and shaking it vigorously.
The Best Bunny Cupcakes Recipe
Bunny Cupcakes: The Ultimate Marshmallow Easter Dessert
Ingredients
Equipment
Method
- Cream softened butter and sugar for 3-5 minutes until pale and fluffy.
- Add eggs and vanilla, then alternate dry ingredients and milk until just combined.
- Fill liners 2/3 full and bake at 350°F (175°C) for 18-22 minutes until golden.
- Whip butter, powdered sugar, and cream until snowy white and stiff peaks form.
- Cut marshmallows diagonally and press the sticky side into pink sanding sugar.
- Pipe high frosting swirls, then insert ears, pearl eyes, and heart noses.
Notes
Tip 2: Dip your kitchen shears in powdered sugar to prevent marshmallows from sticking while cutting.
Closing & Call to Action
These Bunny Cupcakes are more than just a sweet treat; they are a festive celebration of spring craftsmanship. With their moist golden centers and sparkling marshmallow ears, they are guaranteed to be the highlight of your Easter table. The combination of classic vanilla and whimsical design makes them a timeless favorite for home cooks and professional bakers alike.
If you enjoyed this recipe, please leave a comment below and let us know how your bunny ears turned out! Don’t forget to share your creations on Instagram and tag us, or save this recipe to your Easter board on Pinterest for later. Happy baking!